
Connecting Visual studio to UDE:
In previous blog post we saw how to deploy UDE environment from power shell and using PPAC.
Once you deploy UDE in order to perform development activities you need to connect it to Visual studio.
Following pre-requisites are required before you begin connection.
- Environment with development tools enabled.
- Visual studio with Modelling SDK (https://learn.microsoft.com/en-us/visualstudio/modeling/modeling-sdk-for-visual-studio-domain-specific-languages?view=vs-2022)
- Local DB
- Power platform tools extension from visual studio.
Once all these prerequisites are met you can start connecting environment with the help of the steps below.
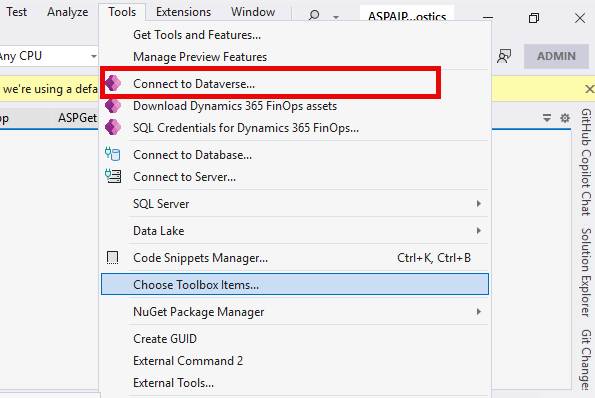
You can visit tools section in VS and click on connect to Dataverse.
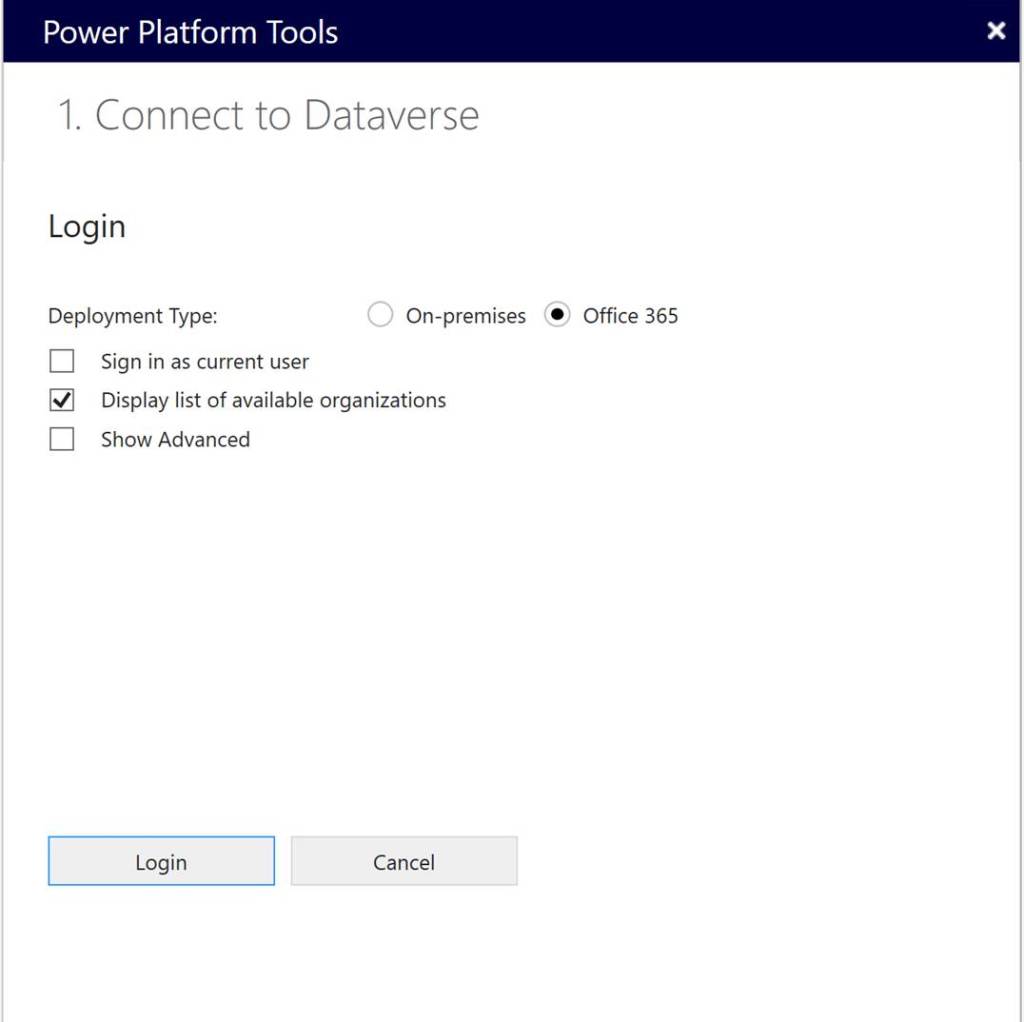
On the following screen you should be selecting option of “Display list of available organizations” and click login.
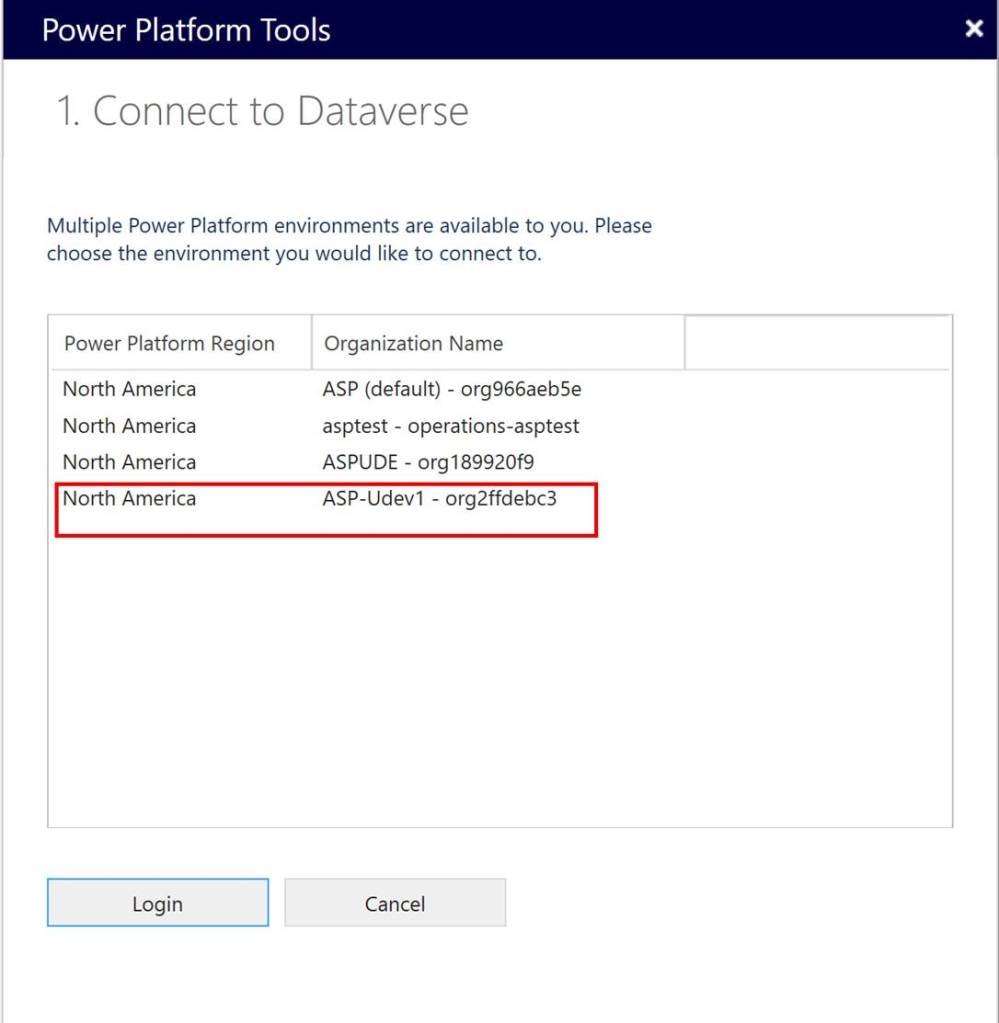
You should be using your login which has access to PPAC. Once you log in, all environments are going to be visible to you as shown below. Select environment which you have deployed and install Dynamics 365 developer tools and click Login.
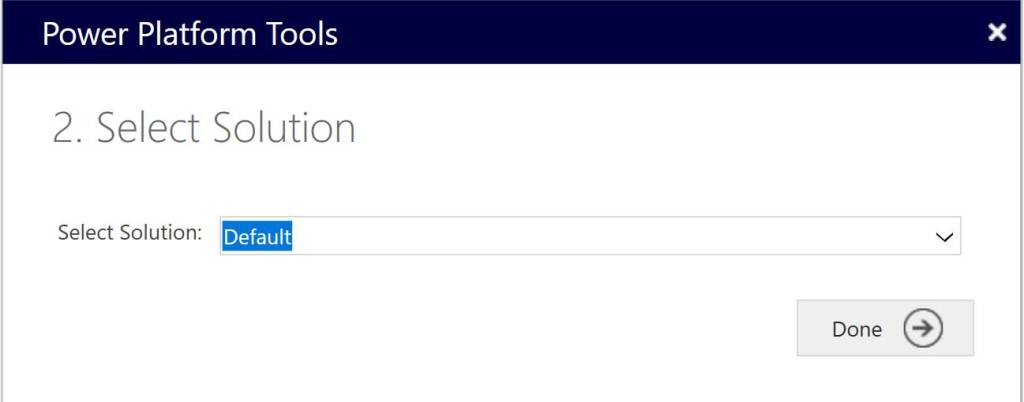
Once it connected, following window is going to appear where you are going to select “Default” solution and click done.
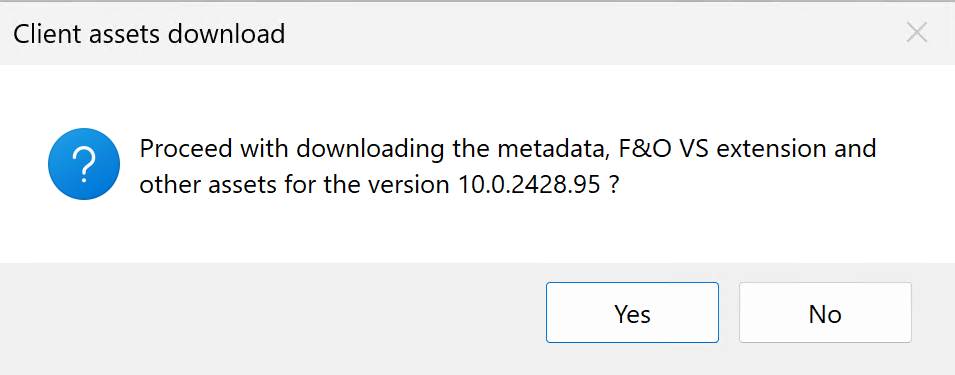
VS is going to ask you to download Metadata, F&O extensions and other assets, click on yes. Automatically a zip file containing metadata, a copy of cross ref DB is going to be downloaded.
The same process is going to extract Metadata, Install VS extension and restore cross ref database for you. Next step is configuring metadata.
Configure Metadata:
Once all above steps are completed, you can open extension menu from Visual studio and click on configure Metadata option which will open following window for doing configurations.
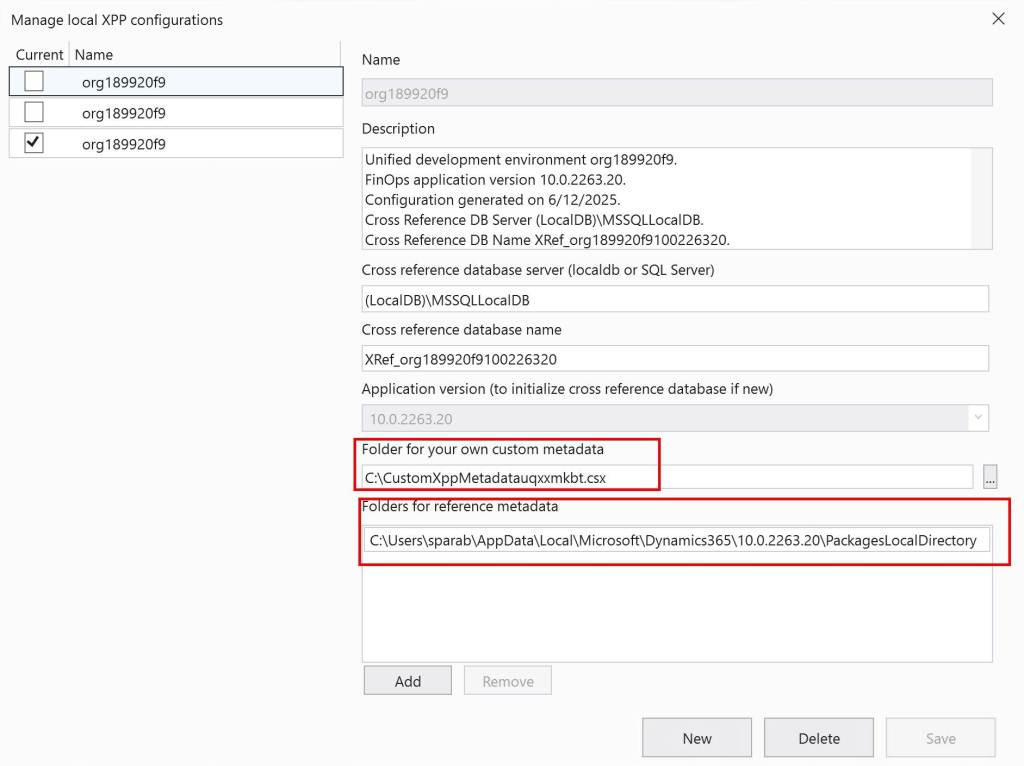
As you can see from the above window, it has environment name. In my case environment name starts with org as I forgot to provide URL in the domain column when I deployed environment. As you can see it has option where you can specify where you can store your custom metadata and also a path for standard metadata which is extracted when we connected VS to Dataverse environment. Standard metadata usually resides in AppData folder.
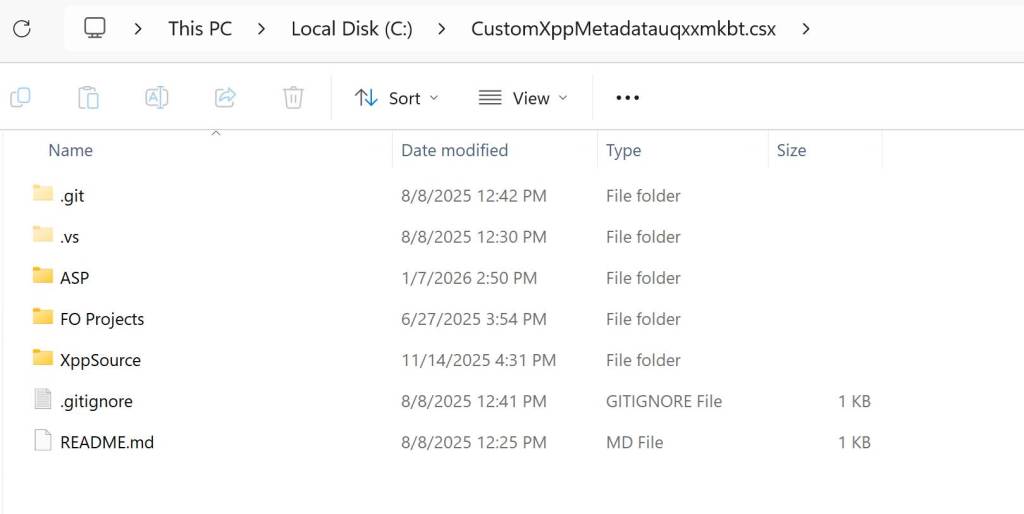
You can see I m storing my custom metadata / my own package in C:\CustomXppMetadatauqxxmkbt.csx folder.
The real advantage of this approach is now you can connect to different environments by maintaining different custom metadata in different folders and locations using this configuration.
Developing and Deploying code from UDE:
When it comes to code development in UDE there is no difference from CHE’s(Cloud hosted environment) but if you want to test it or debug it you need to deploy it to the UDE.
Let see this with example.
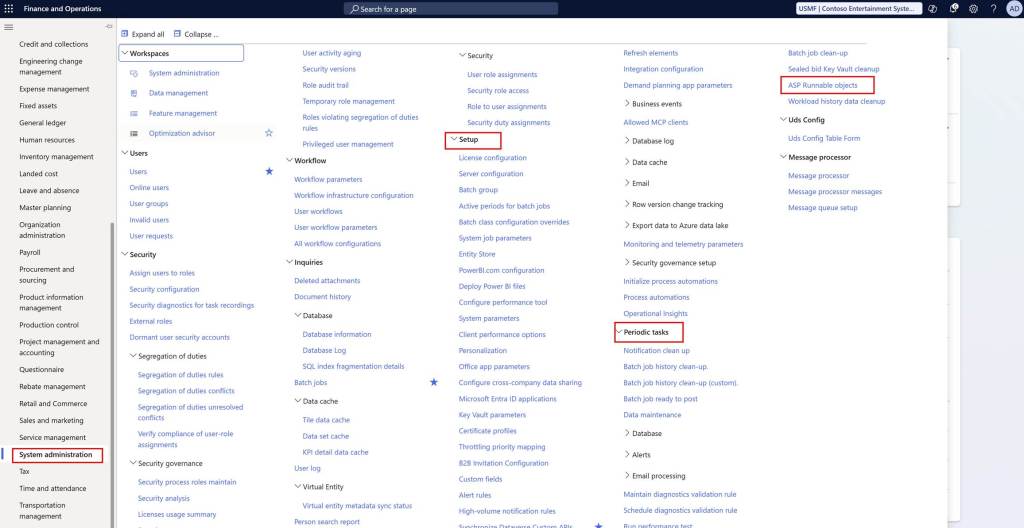
I have created a form with name “ASP Runnable objects”. This form is used to run runnable classes from F&O UI. I created a menuitem for it, and placed it in System Administration > Set up > Periodic tasks. After that I did full build of my model to make sure no compilation error exists.
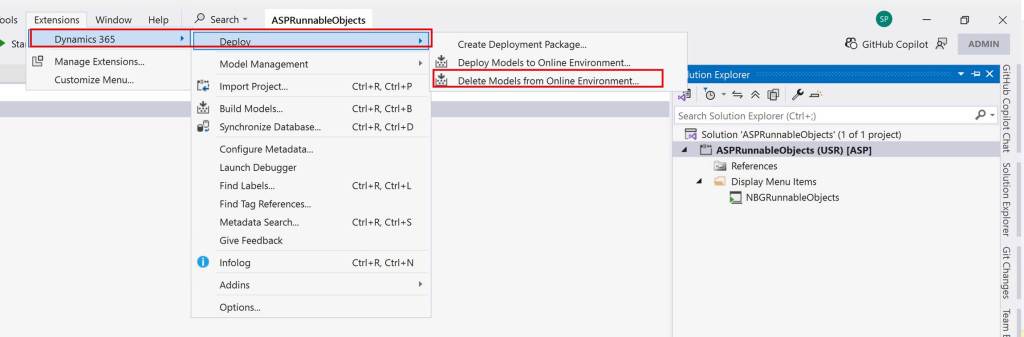
For me to see it in UI, I must first deploy it to F&O environment, and I can do that using following option.
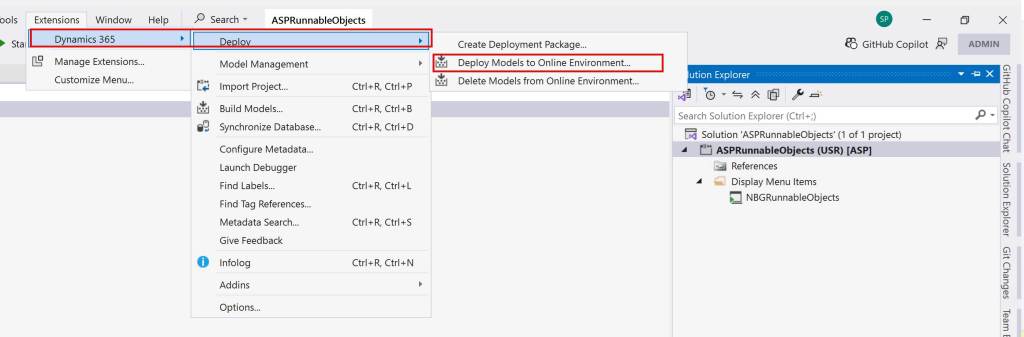
On the next screen you can select your model and deploy your code. If you have schema changes, then you can select the option of syncing DB.

Once the deployment is completed, I can see my form added at the navigation I mentioned above.
If you want to delete any model from UDE environment, you can utilize delete model from online environment option from D365 > Deploy menu in visual studio.
Looking at deployment History:
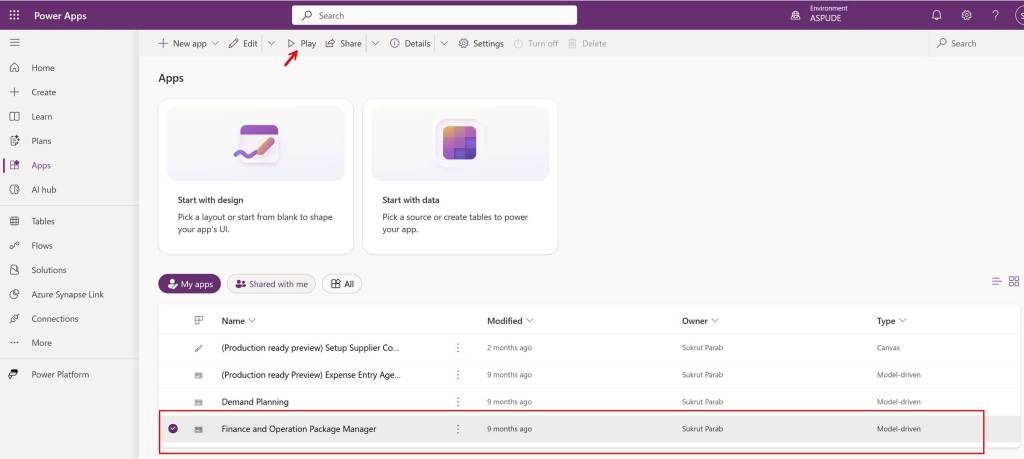
If you would like to look at deployment history you can log in to make.powerapps.com and in the apps section play Finance and Operations Package Manager app.
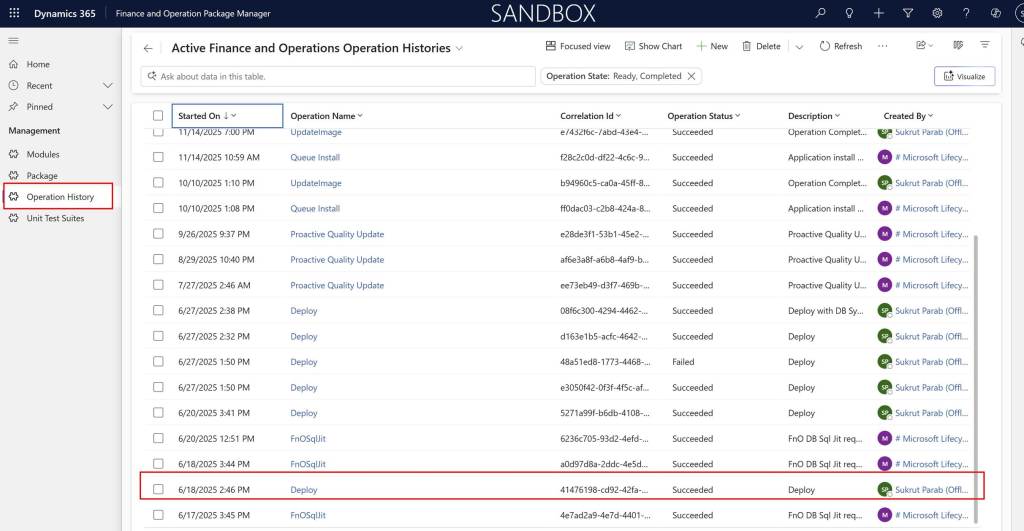
Once you open the app, you can click on Operation History to see all the activities / operations perform in the environment. As you see below , the deployment I performed is succeeded.
Connecting to SQL DB of UDE environment:
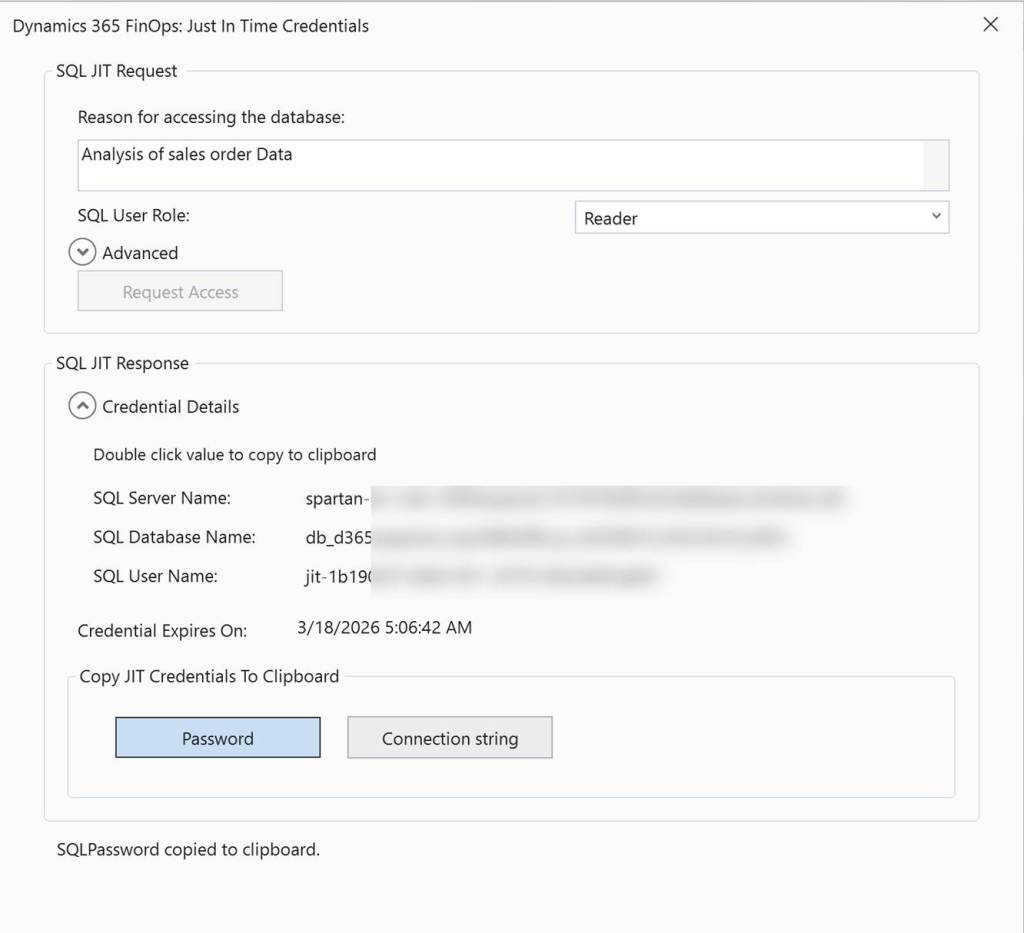
If you want to connect to SQL DB associated with UDE environment, then you can click on Tools > SQL credentials for Dynamics 365 Fin Ops option. Once you click it, you are going to get following option where you are going to enter reason for connection and click Request access. VS is going to fetch you server details along with password and connection string.
lt9TA2PG8vAuPk1JFJFdsyCqpknCIElojwRUnEZ5QkZaUixASN1Oubrf5LwZ47EzlYo4-4Jb1ghJnNLhEpkFeX1cg4
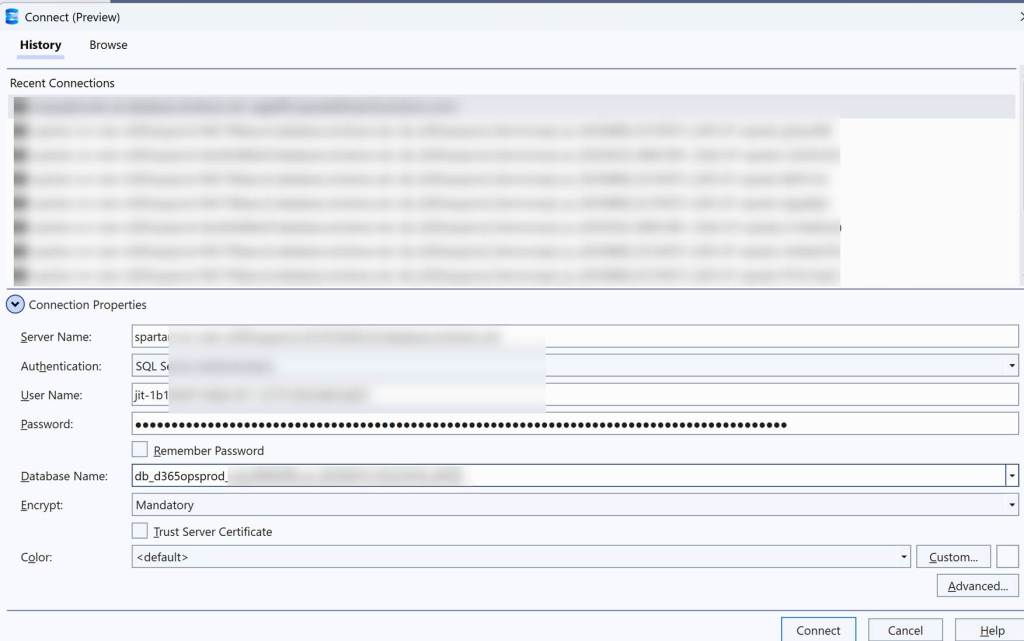
You can then use your local SSMS client to enter details and click on connect button to access the DB as shown below. You don’t have to white list IP like you must be doing it for tier 2 environments in this case.
Upgrading your environment to newest version:
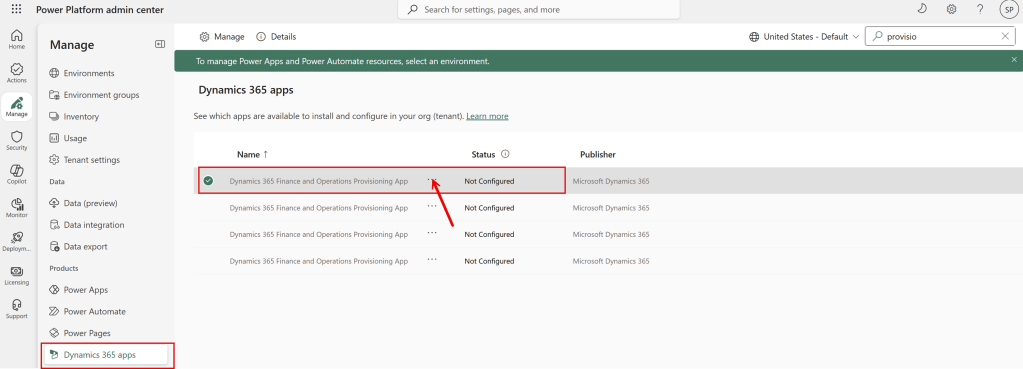
Applying updates is common task we perform whenever Microsoft releases new updates. Updating in a UDE environment is easy and can be done through the Power Platform Admin Center. Visit power platform admin center and click on Manage option and then on Dynamics 365 apps. Search for Dynamics 365 Finance and operation provisioning apps and click on three dots and then click on Manage option.
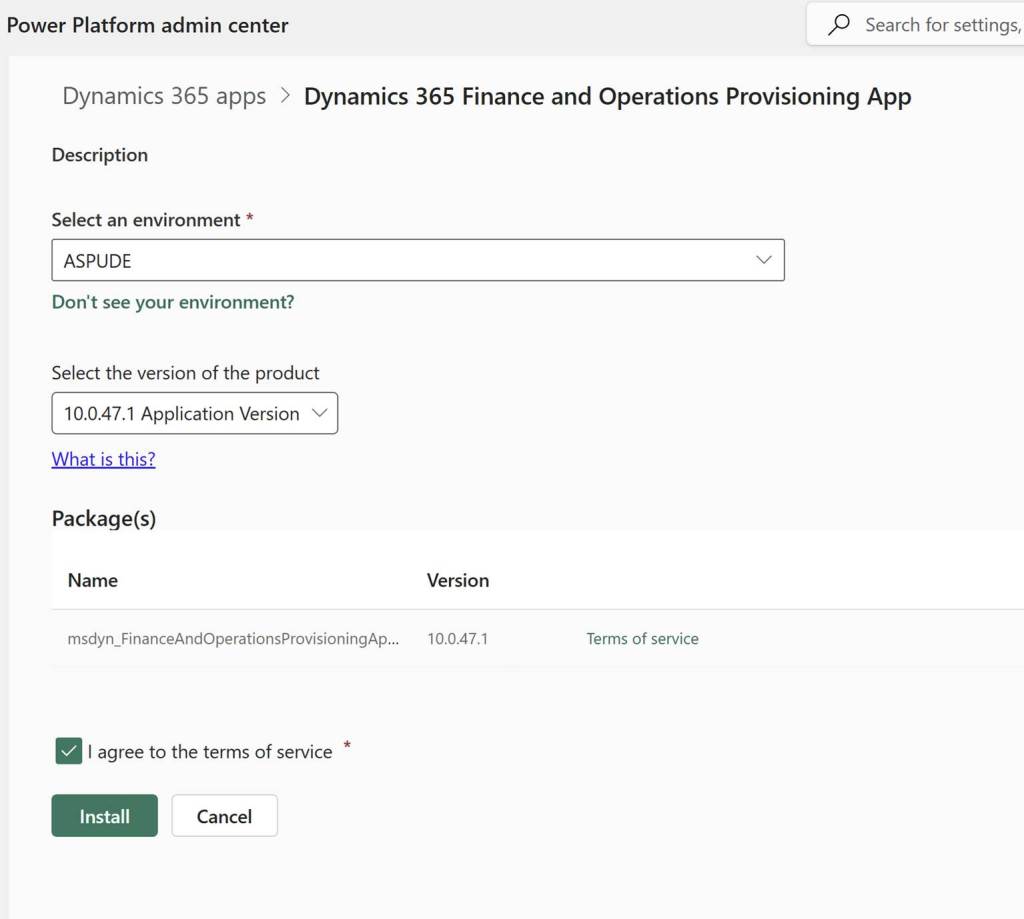
Below screen is going to appear once you click manage where you can select desired update which you want to apply and click install. Wait for it to get install and that’s it, your environment upgrade is done.
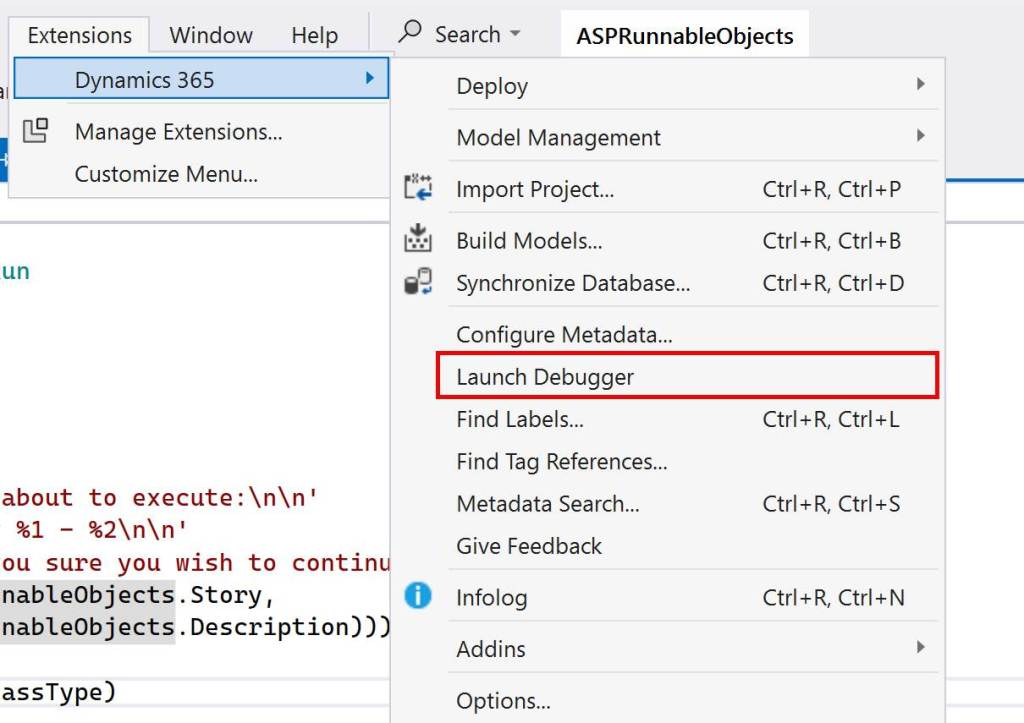
Debugging:
There is small change in terms of debugging in UDE’s. Instead of attaching to process like w3wp.exe or IISExpress you will be placing breakpoints in the object which you want to debug and then use Launch debugger option from Dynamics 365 menu and run your business process.
Useful Microsoft learn references: https://learn.microsoft.com/en-us/power-platform/developer/unified-experience/finance-operations-dev-overview
